Fix Your Own Cherokee Power Window and SAVE!!

You push the power window button. You hear the motor running but nothing happens. Usually the window drops an inch or so.. What happened?
Evidently, this is common although I wrote to Chrysler and although I have heard of many of these cases, Chrysler says there is no general recall.
I have a 98 but I'm sure most models are relatively the same. Your motor works but there is a long "worm screw" that has detached from a bracket. The bracket attaches to the bottom of the window.
I'm not a mechanic by any stretch but here's what I did... stick with me. it's really not that hard especially once you do it once -- now I cant wait for the other ones to break so I can fix them too ;~)
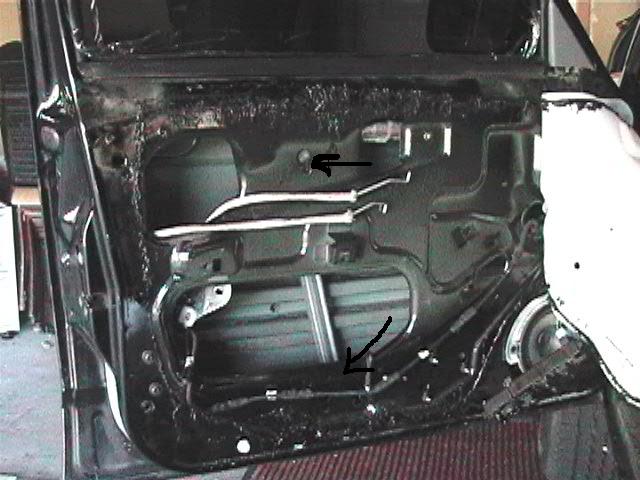
Carefully pull off the inside door skin. There are plastic body clips holding it on around the perimeter, three large Phillips head screws and one small one near the front.
Then there are two control arms that attach to your interior door opener handle - one for opening, one for the lock. Remove plastic clips that hold them in place then pop out the control arms.
You also have to unplug your power switch from the armrest.
Now you can pull the door skin right off.
ok, so you have the panel off right? If you don't, I'll wait here for a minute while you do that....

ok your back? Now you need to tear away the white vapour barrier - its stuck on with black stuff - peel it back and make sure you don't get it on your clothes.
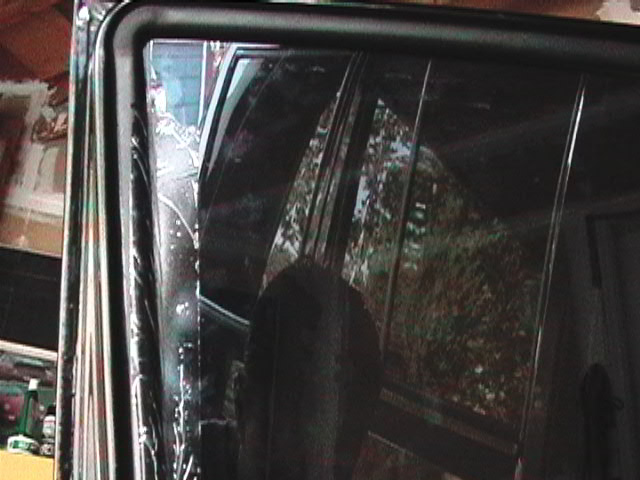
now you should see the inspection ports-with the window half way down you should see the bottom of the window.
Now you need to tape the window up, otherwise it will fall down. I used 2 inch wide scotch tape - don't use duct tape 'cause the glue is hard to come off afterwards. Tape the glass to the vertical post at the back and tape along the bottom horizontal edge.
ok - see the bracket at the bottom of the window? Take that off.
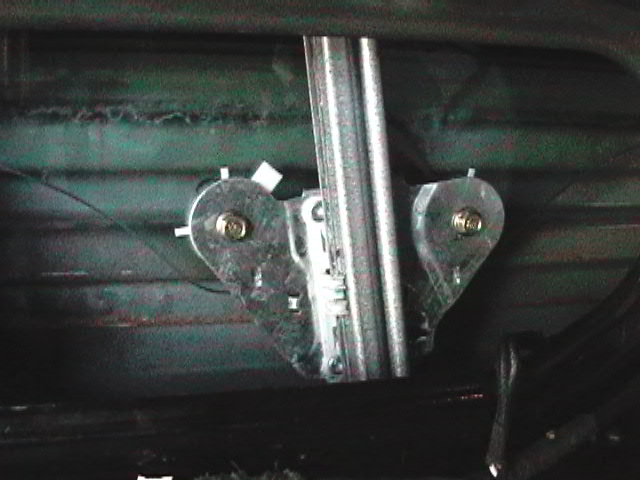
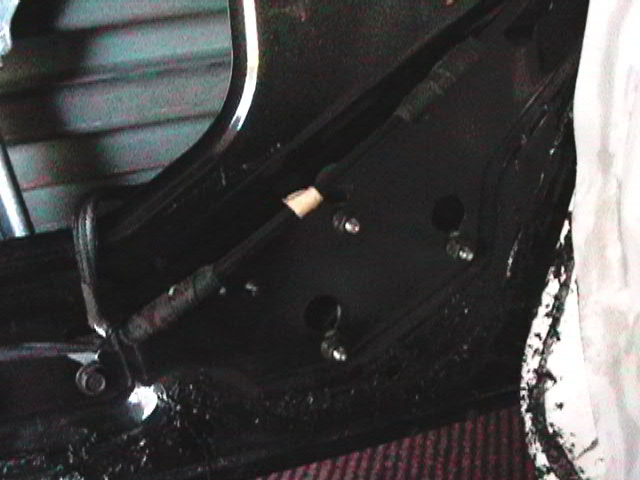
now unscrew the vertical track
also unscrew the power motor.
all you need to do is get the track out of the inspection port so that you can access the worm screw. You Don't have to unwire the power motor!
Now (drumroll) Here's the ingenious part that saves you hundreds and make you a big hit with all your friends!
I took that bracket and using a chisel, I chiseled off the plastic from the steel (the plastic is the reason it busted in the first place)

I drilled two holes in the steel part where the plastic teeth would have been-make sure it lines up where it used to be on the track - mark where the holes are to go in relation with the track.

then you need a couple of cotter pins - yep that's right cotter pins.
Bend open the bottom of the track so you can get access to the worm screw and power (use the power switch) the worm screw out of the track a bit.
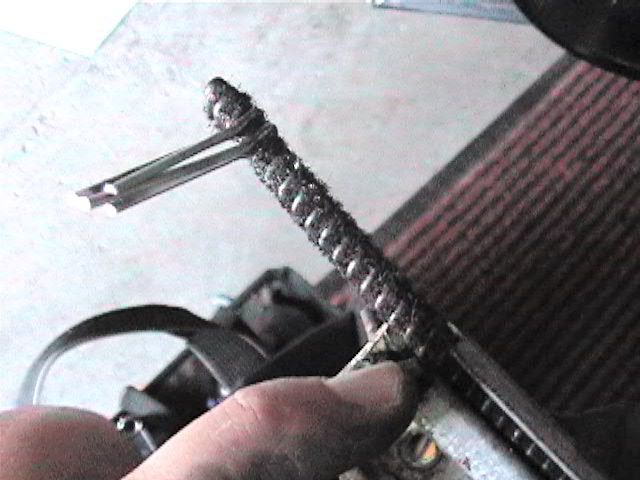
The cotter pins wrap around the grooves in the worm screw at the end. Make sure they are tight right into the grooves cause when the screw going back into the track, you don't want there to be any unnecessary friction. I used two. One didn't seem like enough but three might have caused too much friction in the track so two was "thy number of thy counting" in this case.
now power (using your power switch) the screw back into the track [actually first I sprayed the track, the hose where the screws comes from and everything with WD40.]
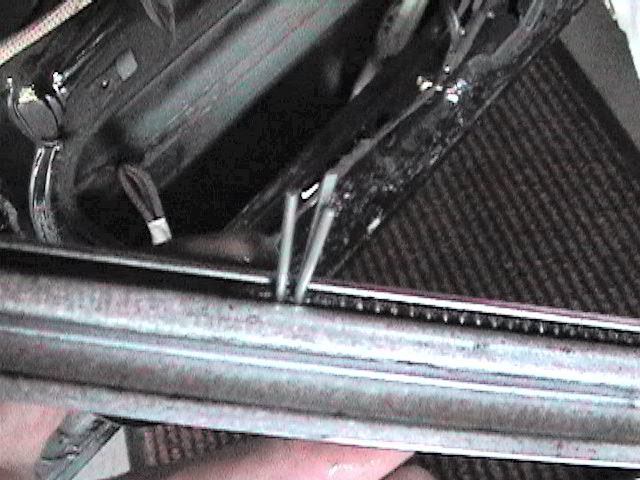
now put the bracket back onto the cotter pins which should now be sticking out from the track. Bend them over and cut off the excess.

put everything back the way you took it apart and BOB'S YOUR UNCLE!! (I haven't got a clue where that saying came from {:~0
Savings: between $150-300 for the entire regulator assembly (Canadian $) and about $200 for labor! PLUS TAXES!!
Questions? email info "at" GroupMax.ca
our other websites:
GroupMax.ca
WiseGuyProductions.ca
StockwellRealty.com
PDETA.BlogSpot.com
best, Phil
PS -- its not just about the money that was saved. For me, it was more about conservation and Repairing not Replacing everything. Today, no one wants to repair things anymore, just throw them out and replace them. This goes for VCRs, Microwaves, Televisions, Computers even cars! We are living in a disposable society. There was nothing wrong with my power window motor, or the track, or the window itself but noone was willing to sell me just the bracket. I asked dealers, mechanics aftermarket shops, not even the wreckers! So What would have happened to my perfectly good motor, track etc? Garbage?
Labels: Assembly, Cherokee, CJ, Fix, Grand, Jeep, Power, Window, XJ, YJ
posted by Phil at 12/04/2005 10:31:00 PM
![]()
![]()

26 Comments:
Thank you sooo much for taking out the time to write the instructions and take pictures. After I figured everything out, it took me about two hours. The only modification was the use of heavy duty wire.
Once again, thanks.
ps
Make sure you use a drill bit that is large enough for the korter pins or wiring.
This comment has been removed by the author.
What a money saver. I had waited 6 months with the driver side window on my cherokee broken. I was surfing for a replacement part when I came upon this repair. Worked great and was pretty easy.
Thanks a bundle
Great instructions and pictures. If it wasn't for these pictures and instructions, I would have had to pay alot for parts and labor. Thanks for taking the time to do this.
The only modification I made was the wire since I didn't have any cotter pins. Also, I drilled straight through the plastic. I think that might add some support to the wire I used. Thanks again.
Thank you for your post. Unfortunately I didn't find it in time. But I'm definitely waiting for the left passanger window regulator to go out so that I can do it myself.
Just wanted to say thanks! The passenger window in my 98 Cherokee Sport just dropped out and your's was the only site I found with a way to fix the problem (without throwing lots of money at it).
Many Thanks.
-Forest
P.S. I use Duct Tape - just use some "Goof Off" to quickly remove any residue.
the picture and description was fantastic. keeping my fingers crossed that it holds up. I owe you a beer or 8 if you're ever in chicago.
I used a big C-clamp and a pair of shoes instead of tape- one on each side between the clamp and the window, to give it grip and prevent the C-clamp from breaking the glass. Also is good because you can take it off and on if you need to move the window. It is hard to get a socket in the top part of the door to unbolt the carriage bracket from the window, loosen the clamp, drop it down - remove the carriage - and put the window back up.
I used wire instead of cotter pins too. I did find it heplful to chisel some of the plastic off, but be careful because the other part of the plastic keeps it on the track - don't break that off. probably can be done without chiseling any plastic off at all, but there is less room for play on the wires that way.
Important tip: Most likey when your window fell down, you tried to roll it back up - this would cause the screw too power all the way through the motor and out the other side. You will know this has happened if the screw is not moving but you can still hear the motor. You need to push it back down the plastic tube, keep pushing while powering down the window, this will suck the screw back through the motor.
Thanks so much, what a great thread - saved me hundreds and only took me about three hours, to do. Thanks. Thanks. Thanks.
Thanks so much! I found your site on a 20 degree day. I needed that window fixed pronto. I'm a little slow so it took 3 hours for me. Might want to mention using heavy duty wire instead of cotter pins on main page (I used cotter pins but took 2 cold trips to the store). I also had to take apart gear to get to the plastic part that had broken off.
Thank you thank you thank you!
Cool page. I came up with pretty much the same idea after I took everything apart to figure out what the problem was. I didn't have any cotter pins handy so I cut up a thin wire coat hanger and made do. Actually worked out quite nicely. You did a good job with the pics and step by step instructions!
Thanks a lot for the great fix. I got mine fixed with 2 3/16 pins.
15 cents each it was nothing compated to the 130 for the entire replacement system. I didn't Chisel the plastic out, I drilled through it.
Thanks for putting this up- my husband's 1998 XJ had the window fall down on Friday night. He found this site on Saturday morning and we had it fixed before lunch! We used some thick tie wire instead of cotter pins. Our only hang-up was that the plastic piece that holds onto the worm screw didn't completely break off from the bracket so we had to "break" it further to actually get the bracket out of the track. We re-read the directions dozens of times before determining that, yes, we really did need to break it off the rest of the way. Once we overcame that, the rest of the repair went really quickly. We love the feeling of saving ourselves money and saving a perfectly good motor from the garbage dump!
kudos from another XJ owner... my window just fell on friday and I was hoping to find a great solution JUST LIKE THIS.
Great Breakdown. This took me approx 30 mins to complete, and like you said it is not just about the money saved but the parts spared.
What a great fix! I am down here in Mexico working and I had no idea where I was going to find the parts. Thanks so much, it is getting hot down here and with all the dirt roads, having the window down all the time gets pretty miserable. My wife and kids commend you!
Mikol
Liked the cotter pin idea, worked great! Wanted to add that if you apply pressure down on the window the cotter pins bend out and you have to take the door appart again. My solution was to put some JB weld over the back side of the cotter pins to weld them to the window plate so they don't bent out so easy.
Nate
that's a good idea too. The key is to use pins thin enough to be able to be bent right into the grooves of the worm screw - so they are flush. If the fit is tight enough, you should only be dealing with sheer strength, not "bending" - theres no way they will sheer. I think your pins might not have been tight enough, or flush enough. Also use three pins to spread the load. Never had a failure yet. My fix has been working for years. Cut the excess off too. Welding is also a good idea too for extra strength.
Great post! I love when people include pictures.
I came here because I had an intermittently-operable window on my 2000 XJ. Just a word of warning to other people looking at this topic: My XJ doesn't use a worm screw. I'm guessing they changed the drive mechanism on 2000+ Cherokees. It uses a cable drive.
The track appears to be the same though, so I sprayed WD-40 into the back of the track before I got the mirror and found out that the screw wasn't there. Meanwhile the white and blue tubes had been confusing me. Then I put 2 and 2 together. (They are cable guides).
I had a friction issue; no broken parts, so I was able to lube the cable with grease and it seems to work. Not sure how it'll hold up with grease-on-plastic and grease in the cable-drive box (which presumably uses friction to hold the cable in place). Keeping my fingers crossed.
I just finished doing this last night and it has resolved my issue. Thanks for the how to!
Thank you very, very much for sharing this. I fixed my window last night in about an hour and a half. I'm not a mechanically inclined person, so it took me a few minutes to get my bearings. This really does work. Won't have to fix THIS window again. It's ridiculous that these windows are being held into place with a piece of friggin' plastic.
Does anybody happen to know what years of Cherokees and Grand Cherokees, or other makes and models for that matter, that share this same window assembly?
Thank you so much. You just saved me a lot of money. And probably a cold as well since my window now stays up :-)
Thanks Ill give it a try, now I know more how it works, I had 2 problems, the motor was seized and the lifter was broken thanks to this blog I now know now how it lifts operates
I have a 1999 jeep sport 4 doors and this is an easy take apart . I will just add that I
have un seized the motor, This is such an easy job.
Take the motor assembly all apart , there are not that many pieces , take the electric motor cover off and with your hand turn the magnets with your hand and it will start turning, use a degreaser in the gearing section clean it all up and add new machine grease go back to the motor and there is room to attach your electric drill to it and start on slow speed and turn the crankshaft then go in reverse, do this a couple of times and she will become loose again, if it is still sticky work with the degreaser a bit more and she will come loos, really!!!! A easy job.
Yeah I hate when we go to the dealer for a small part and they try to sell you the whole assembly …..booooooo
Thanks very much for sharing this rare information. I am glad to read your blog.
Jeep Wrangler in Houston
Your fix has made it across the pond to the UK. Thanks for posting your idea.
Jeep Cherokee's are known for their wonderful performance. Actually fixing your vehicle parts yourself is economical. One gets to save some cash. Thank you for posting this though. It is going to be good news to some jeep owners out there.
Post a Comment
<< Home